How I built my own Sega Mega Drive hardware dev kit from scratch
Introduction
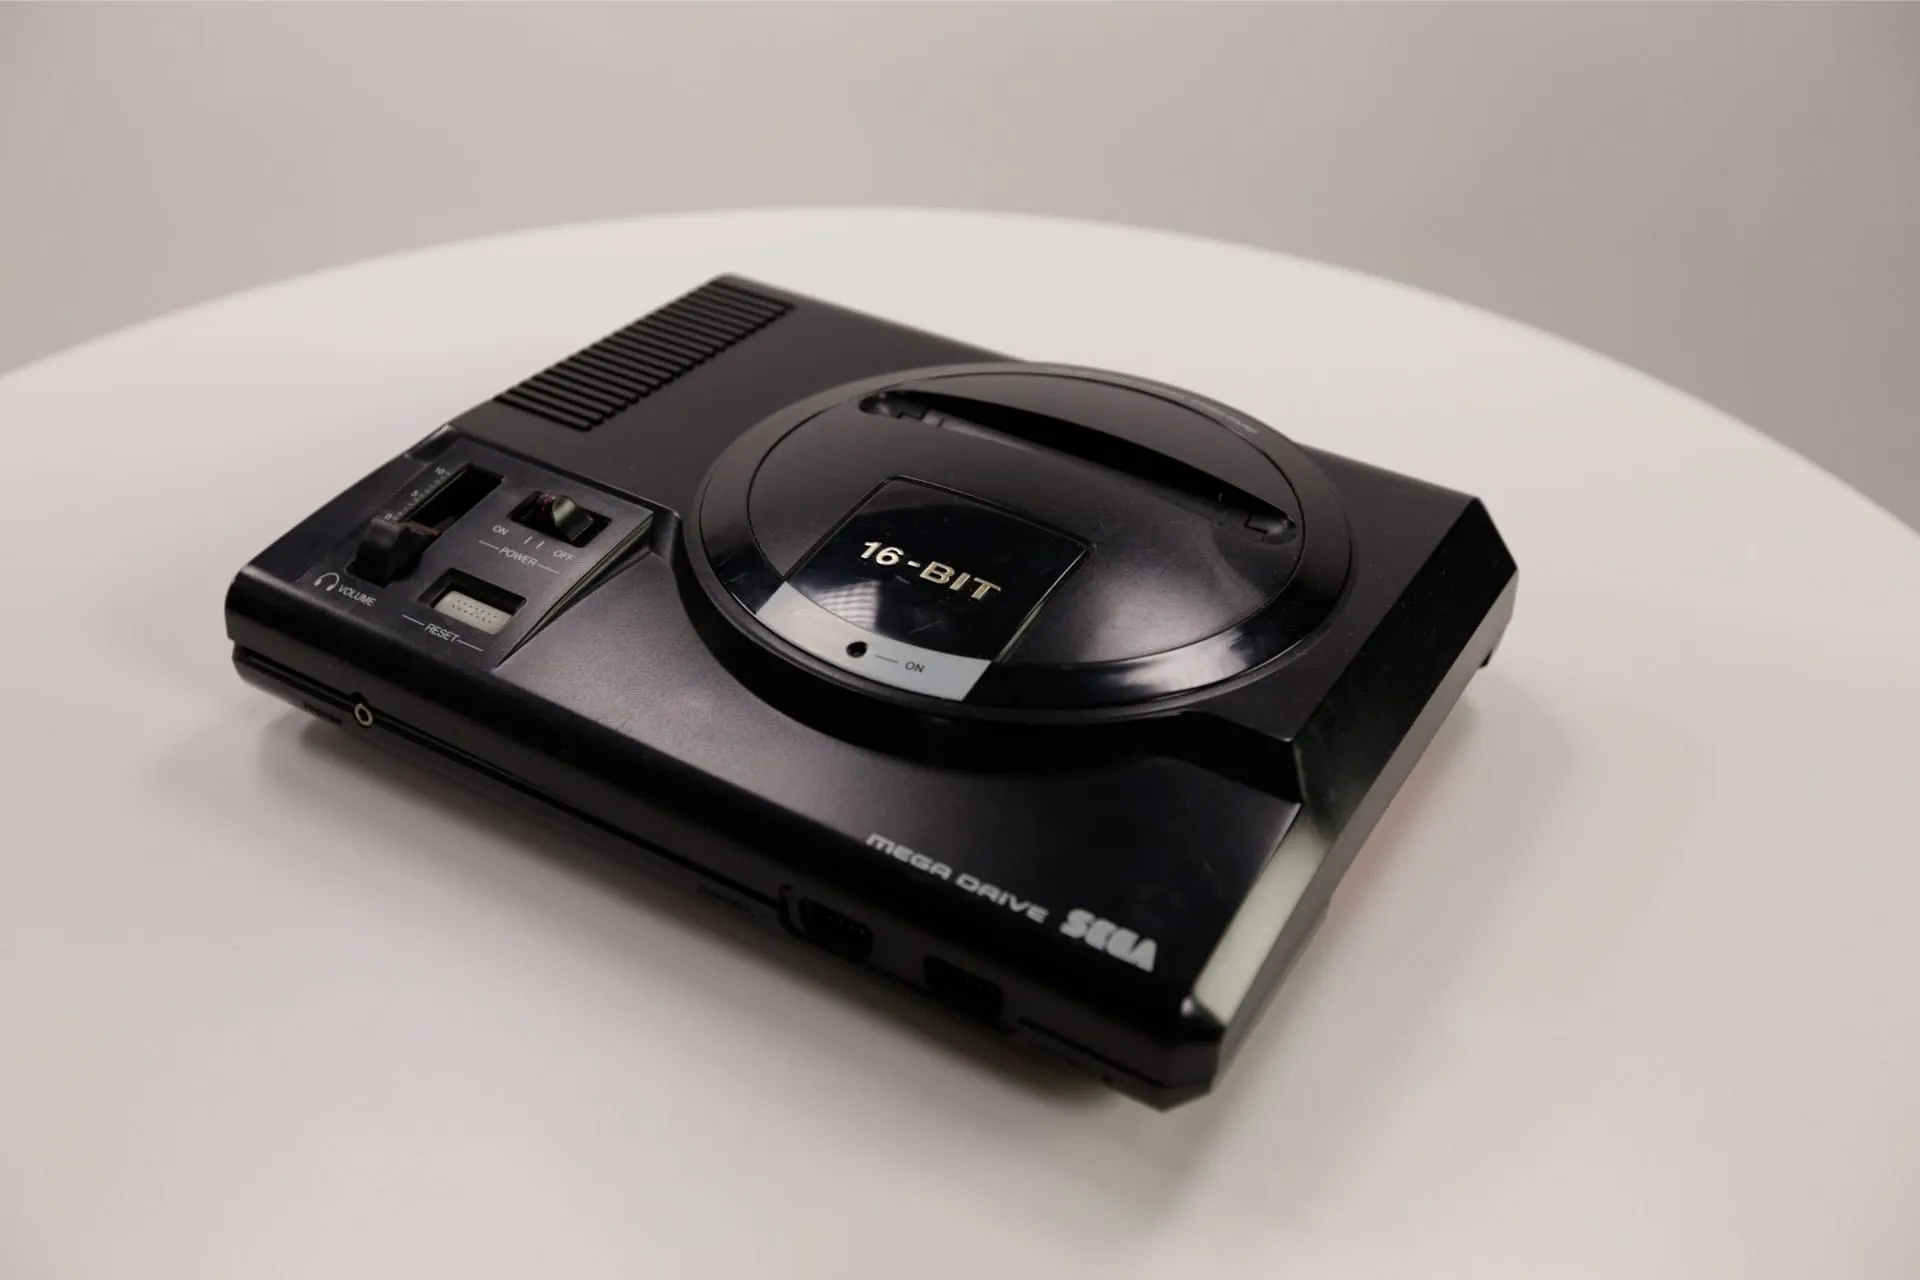
Over 30 years ago, I decided to take on the challenge of building my own Sega Mega Drive hardware dev kit from scratch. At the time, I was eager to develop games and wanted to target a powerful platform beyond the Atari 1040 STE I had. After discovering the Sega Mega Drive and getting hooked on its incredible hardware and games like Sonic and Revenge of Shinobi, I set out to create a dev kit without official documentation or a development kit, just a Sega Mega Drive and a lot of determination.
Eventually, I got the crazy idea that I wanted to develop games for this machine. But surely I would need some crazy expensive and hard-to-get hardware to do that? I had no official developer kit, no money to buy one, no documentation, just a Mega Drive.
So I thought, how hard can it be to build my own kit?
First some sanity checks
But wait? Was I crazy or what? Why did I think I would be able to pull this off?
- The Sega Mega Drive is based around the Motorola MC68000 CPU, a CPU that I was very familiar with on the lowest chip level. It also has a separate Z80 co-processor for audio and other tasks that I was slightly familiar with.
- I was very familiar with the MC68000 assembly language, after many years of low-level assembly demo-programming on the Atari ST home computer. I am one of the original members of SYNC, an Atari ST demo group in Sweden. You can read more about SYNC here and here, and we sure did some quite crazy things on the Atari ST back in the day.
I had tinkered and played with electronics and built small computers for a long time – here are some of the random projects from back in the day. However, I don’t remember what they do :-)
How to approach the challenge?
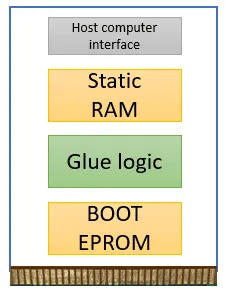
My goal was to design and build a kit that, without modifying the Sega Mega Drive, would allow me to “simulate” a game cartridge using static ram memory. The kit would then be connected to my Atari ST computer where I would be doing the actual programming. An overview of the kit:
The Sega Mega Drive Cartridges
The first challenge was to reverse engineer a game cartridge and figure out the pin layout of the edge connector. The circuit board inside a cartridge looks like this:
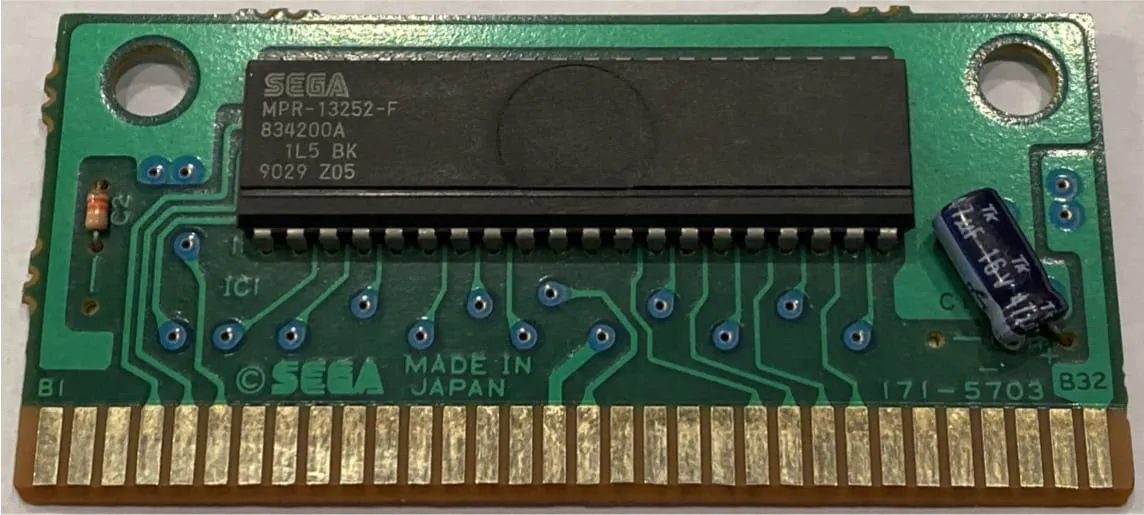
After a lot of research in various chip reference books, I eventually figured out it was a standard ROM chip. With that knowledge it made it pretty simple to figure out what most pins on the edge connector were.
However, there were still some other pins that I needed to figure out to be able to do a complete development kit.
The Sega Mega Drive Game Slot
Figuring out what the pins meant on the cartridge connector inside the Mega Drive was the next challenge. Inside the console, the connector is located next to the 68K CPU and it looks like this:
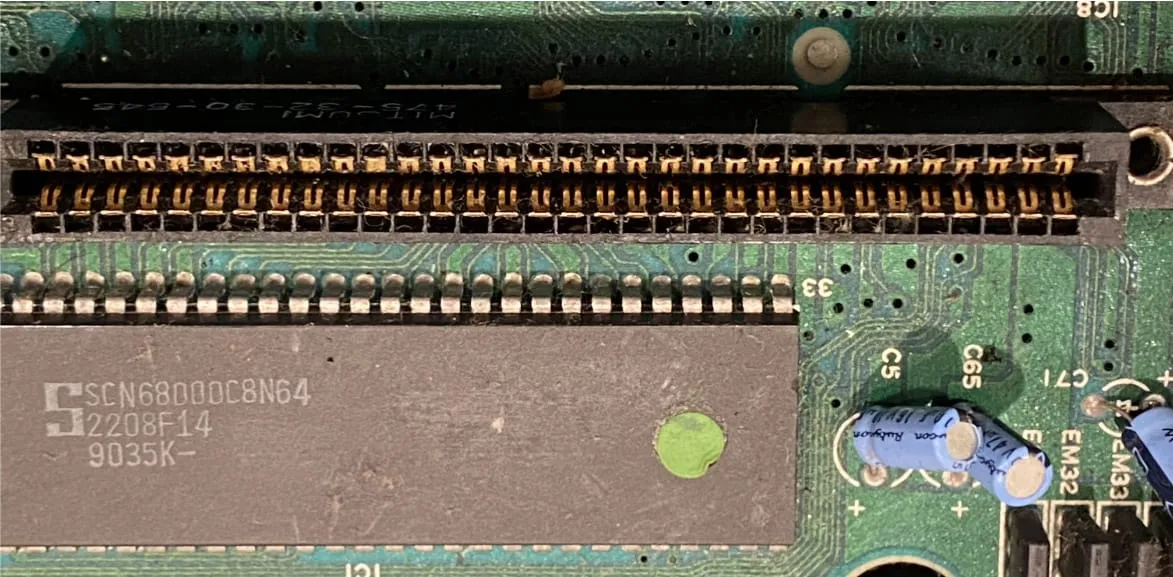
Using my multimeter, I was able to trace most of the connectors directly to the well-known pin layout of the CPU
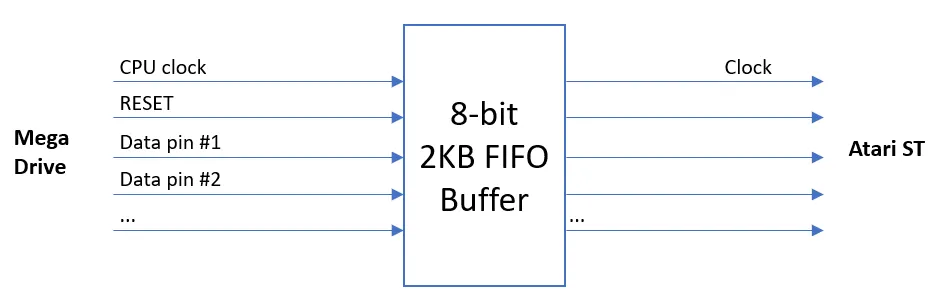
However, there were one or two pins where I could not figure out what they did. And without a proper logic analyzer, it would have been pretty hard to figure out what they did. As I was on a very tight budget, I decided to build my own. How hard could that be? After some thinking I figured out that all I needed was to get an 8-bit 2 KB FIFO buffer chip and use it to sample the signals when the console starts up after a reset sequence. By doing this, I could look at the signals and try to decode their relationship with some of the other well-known pins on the CPU bus. As I was very familiar with how the MC68K CPU bus works, I was up to the challenge.
Basically, what I wanted to do was:
But how could I get hold of a FIFO-buffer chip?
At the time I was staying in Paris with a friend, where we were finalizing a music sound tracker called Audio Sculpture for the Atari ST that we had sold to a French publisher.
So, back to getting hold of the chip. I somehow found out about an electronics trade show in Paris, so I decided to go there with the goal of asking for a FIFO-buffer engineering sample. I eventually found a helpful company that would give me an engineering sample chip for free. Awesome!
Here are some links about the Audio Sculpture sound tracker we published:
- Audio Sculpture Demo Disk by SYNC and Expose Software on Atari ST
- Audio Sculpture at Atari mania.
But how would I get the data out of the FIFO-buffer?
My Atari ST had an expansion port that directly exposed the CPU bus inside the computer, so with some logic, I tied the FIFO-buffer to this port. I wrote some software to extract the data from the buffer and display it to the screen. Using this technique I was eventually able to figure out the purpose of the mysterious pins.
Now I had solved the layout of the cartridge port in the console. On to the next challenge!
Getting my code into the Mega Drive
With the hardware all figured out, I now needed to figure out how I would be able to write software for the console.
My idea was to have a small boot firmware that, at startup, would wait for a binary data dump from my Atari ST. I would connect the kit to my Atari using a home-built transfer protocol that would send it over an 8-bit parallel cable, similar to the parallel printer post most PCs had back in the day.
At startup the Mega Drive boots from the game cartridge, so all I had to do was to add a small boot-firmware that would, at startup, accept the binary data dump and, after receiving the dump, it should start to execute the code. I used two 8-bit EPROM chips to hold the actual firmware.
I did manage to locate some of the source code for the firmware and I have published the code as a GitHub GIST (Not sure if it is the final one) and in this GIST.
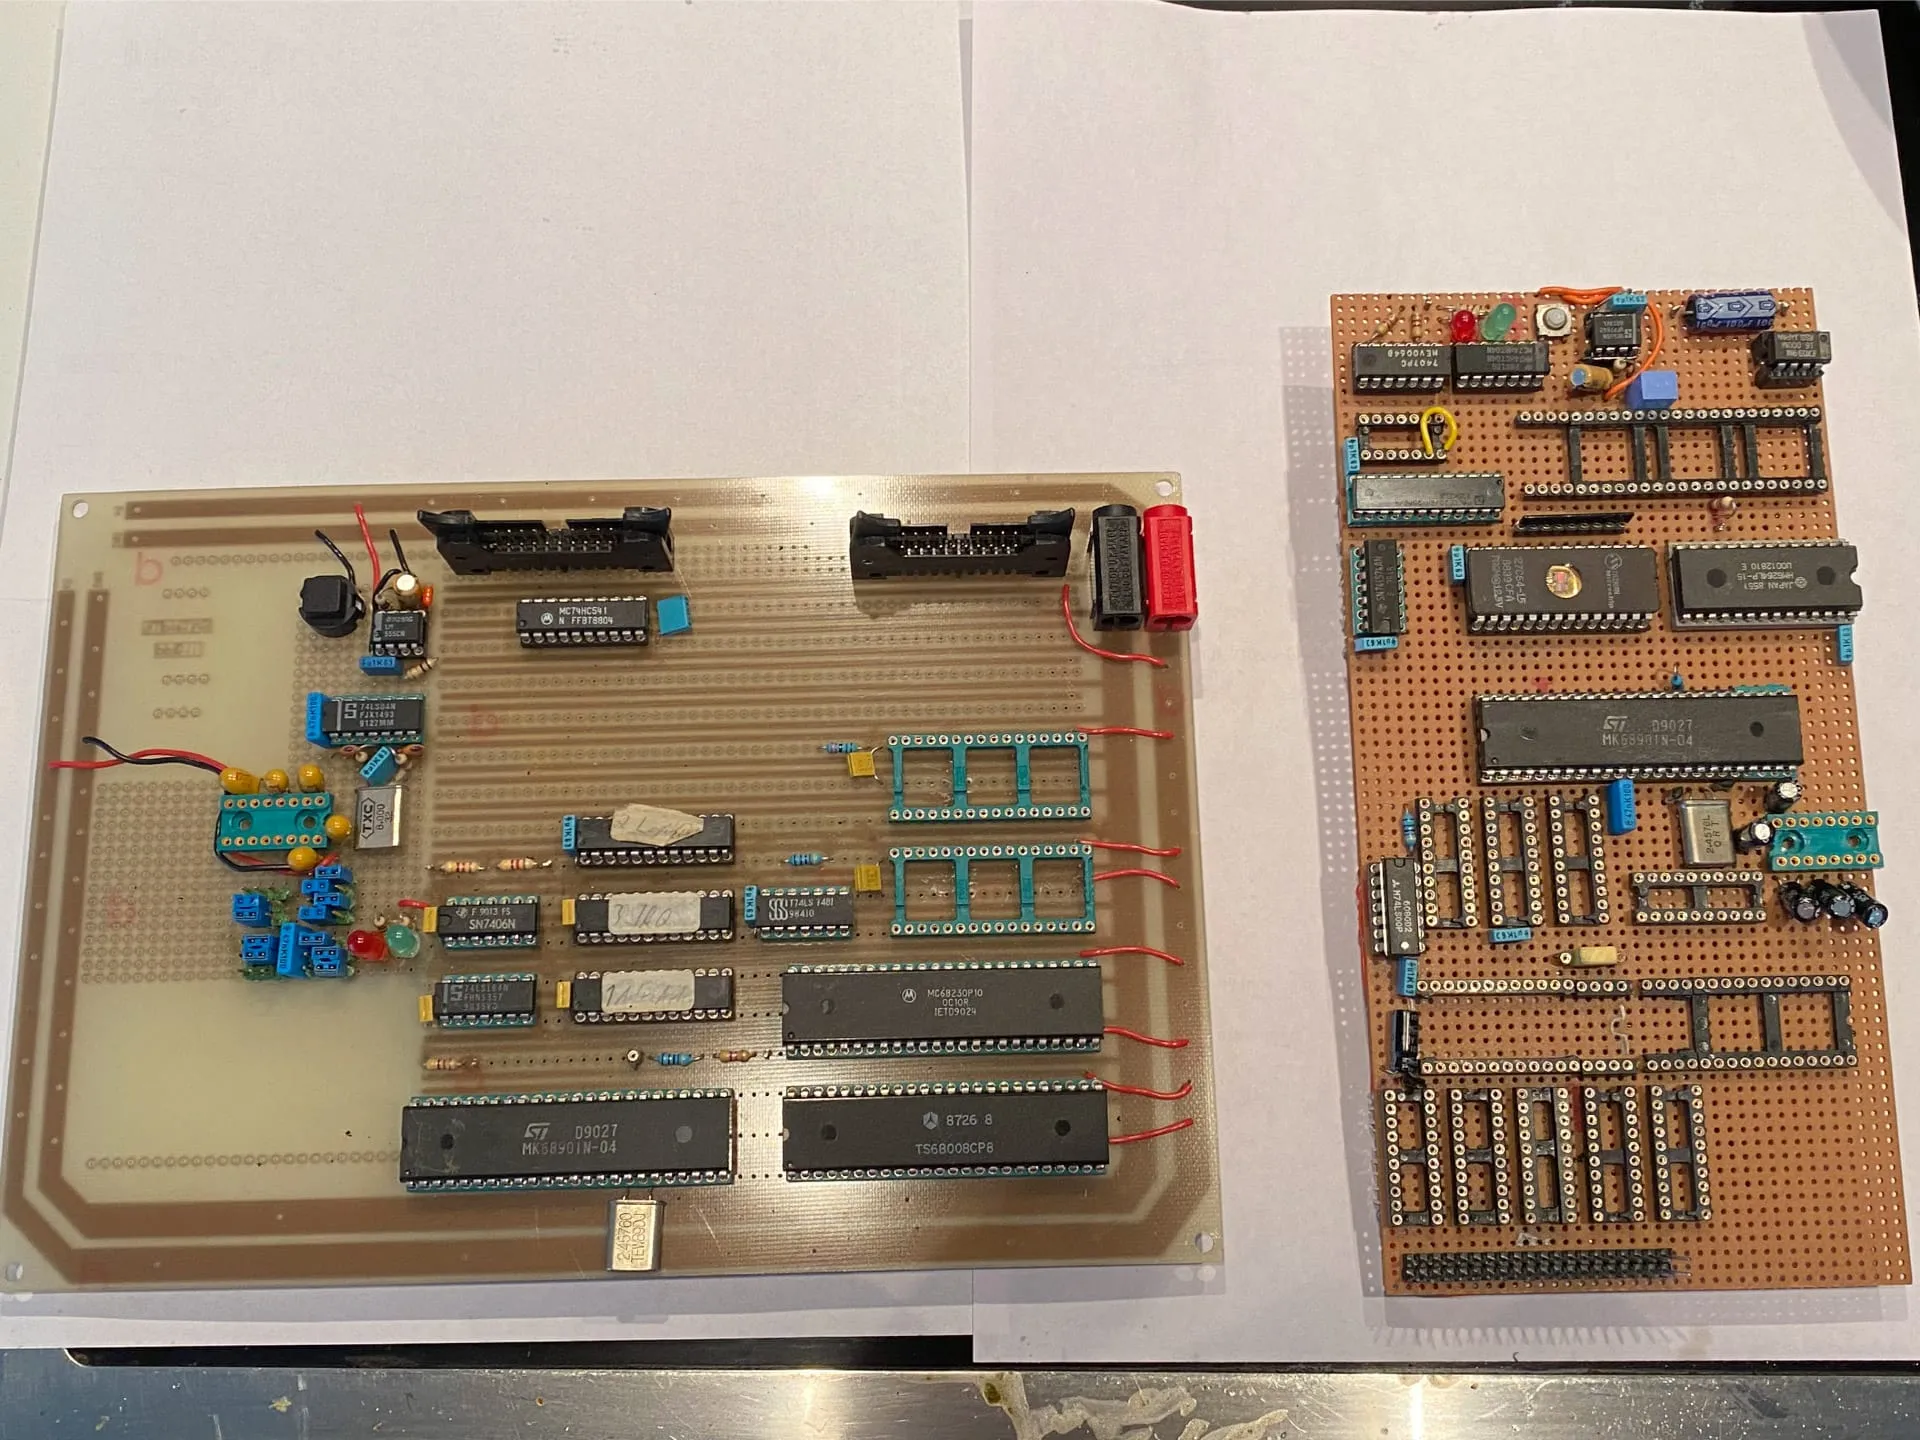
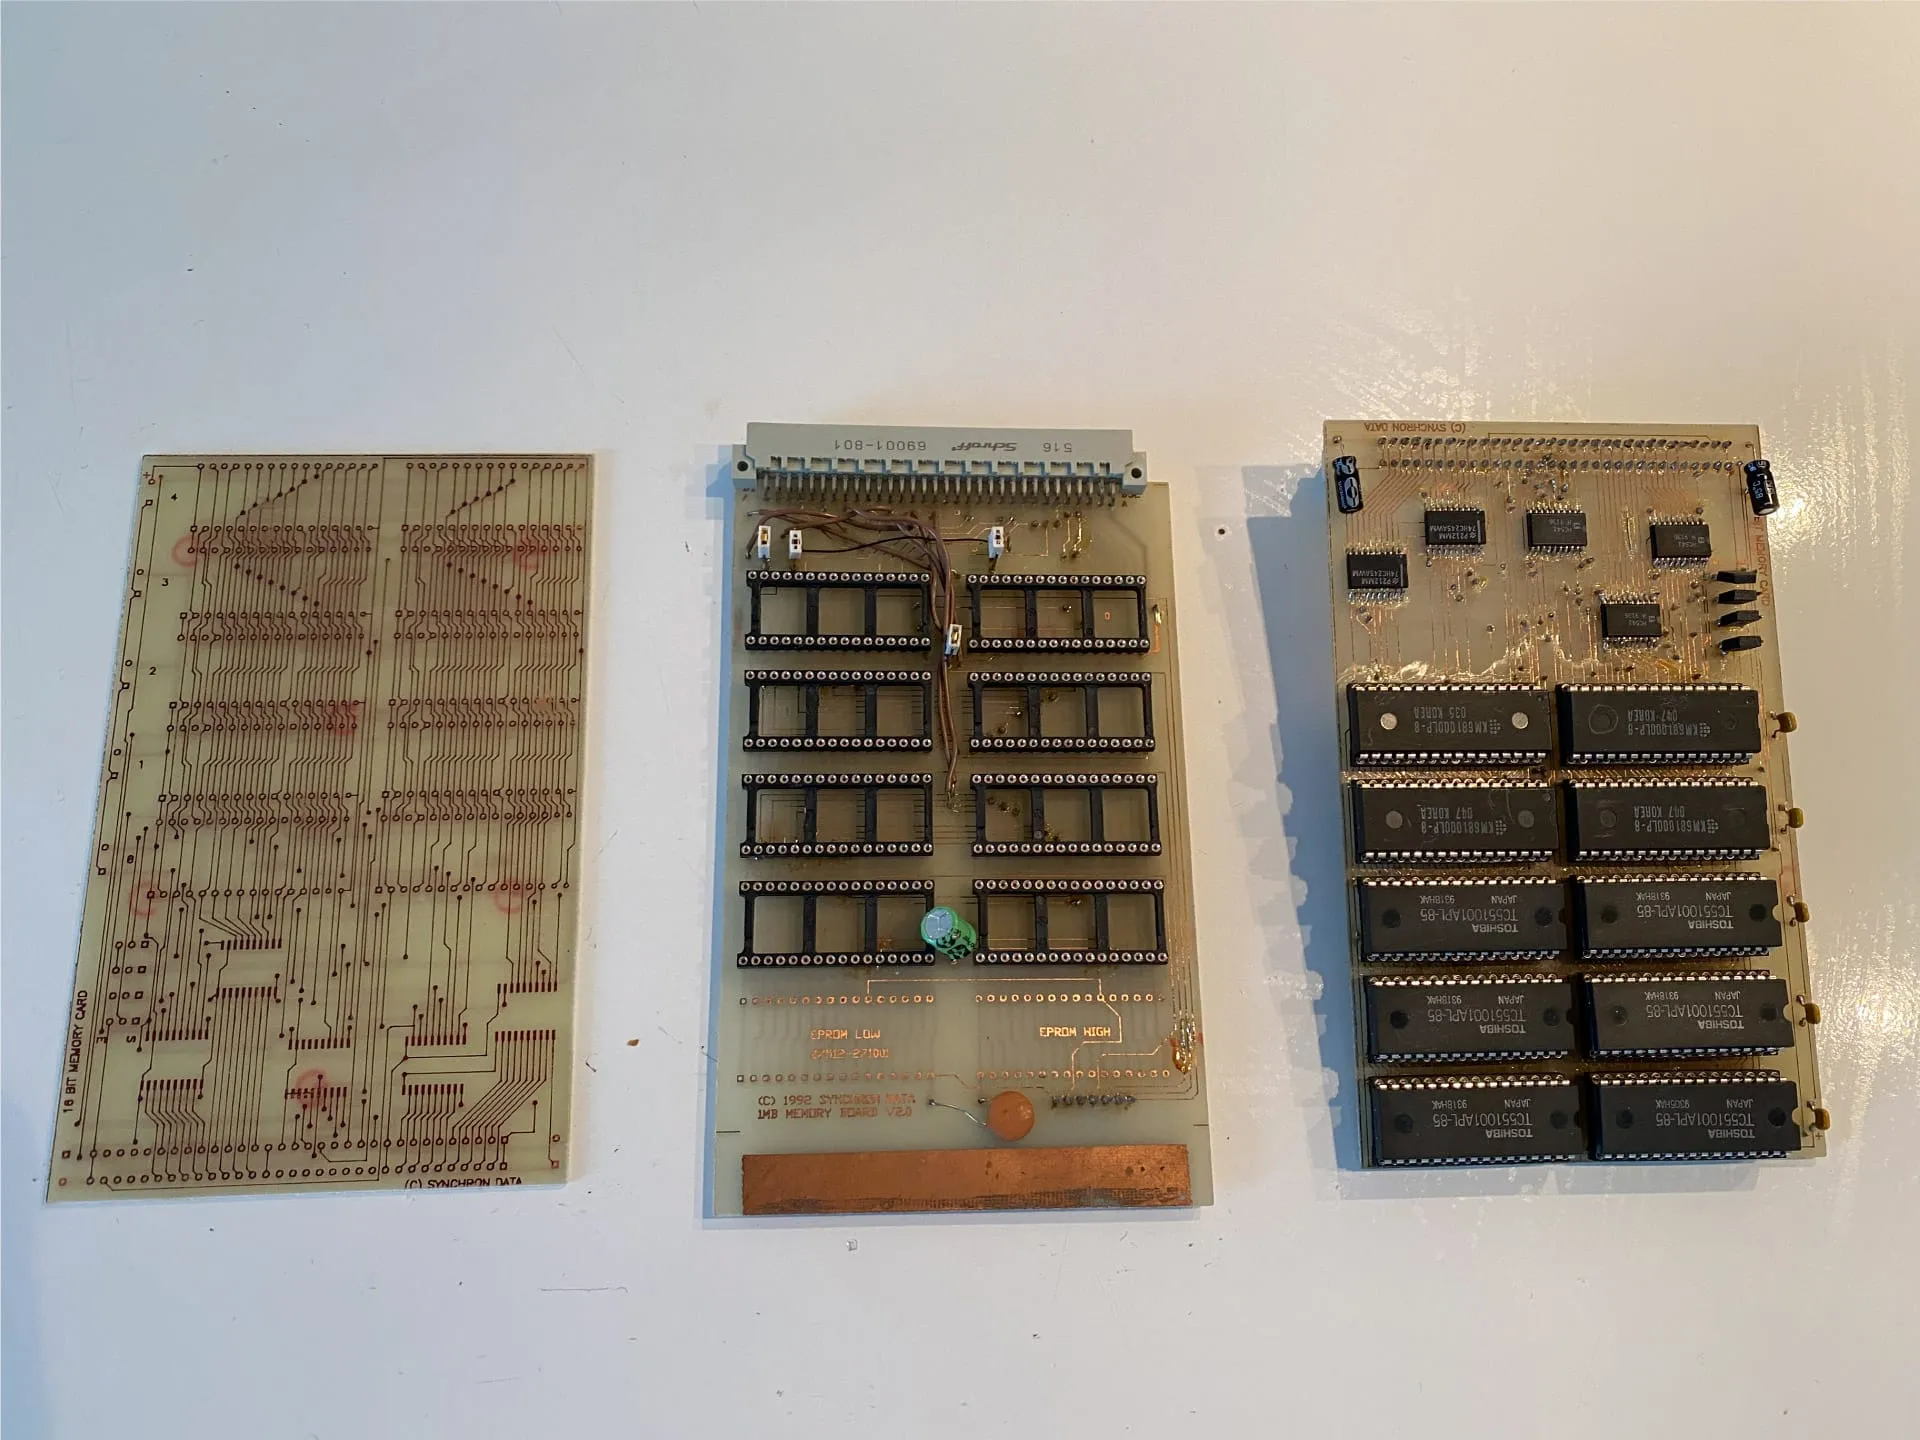
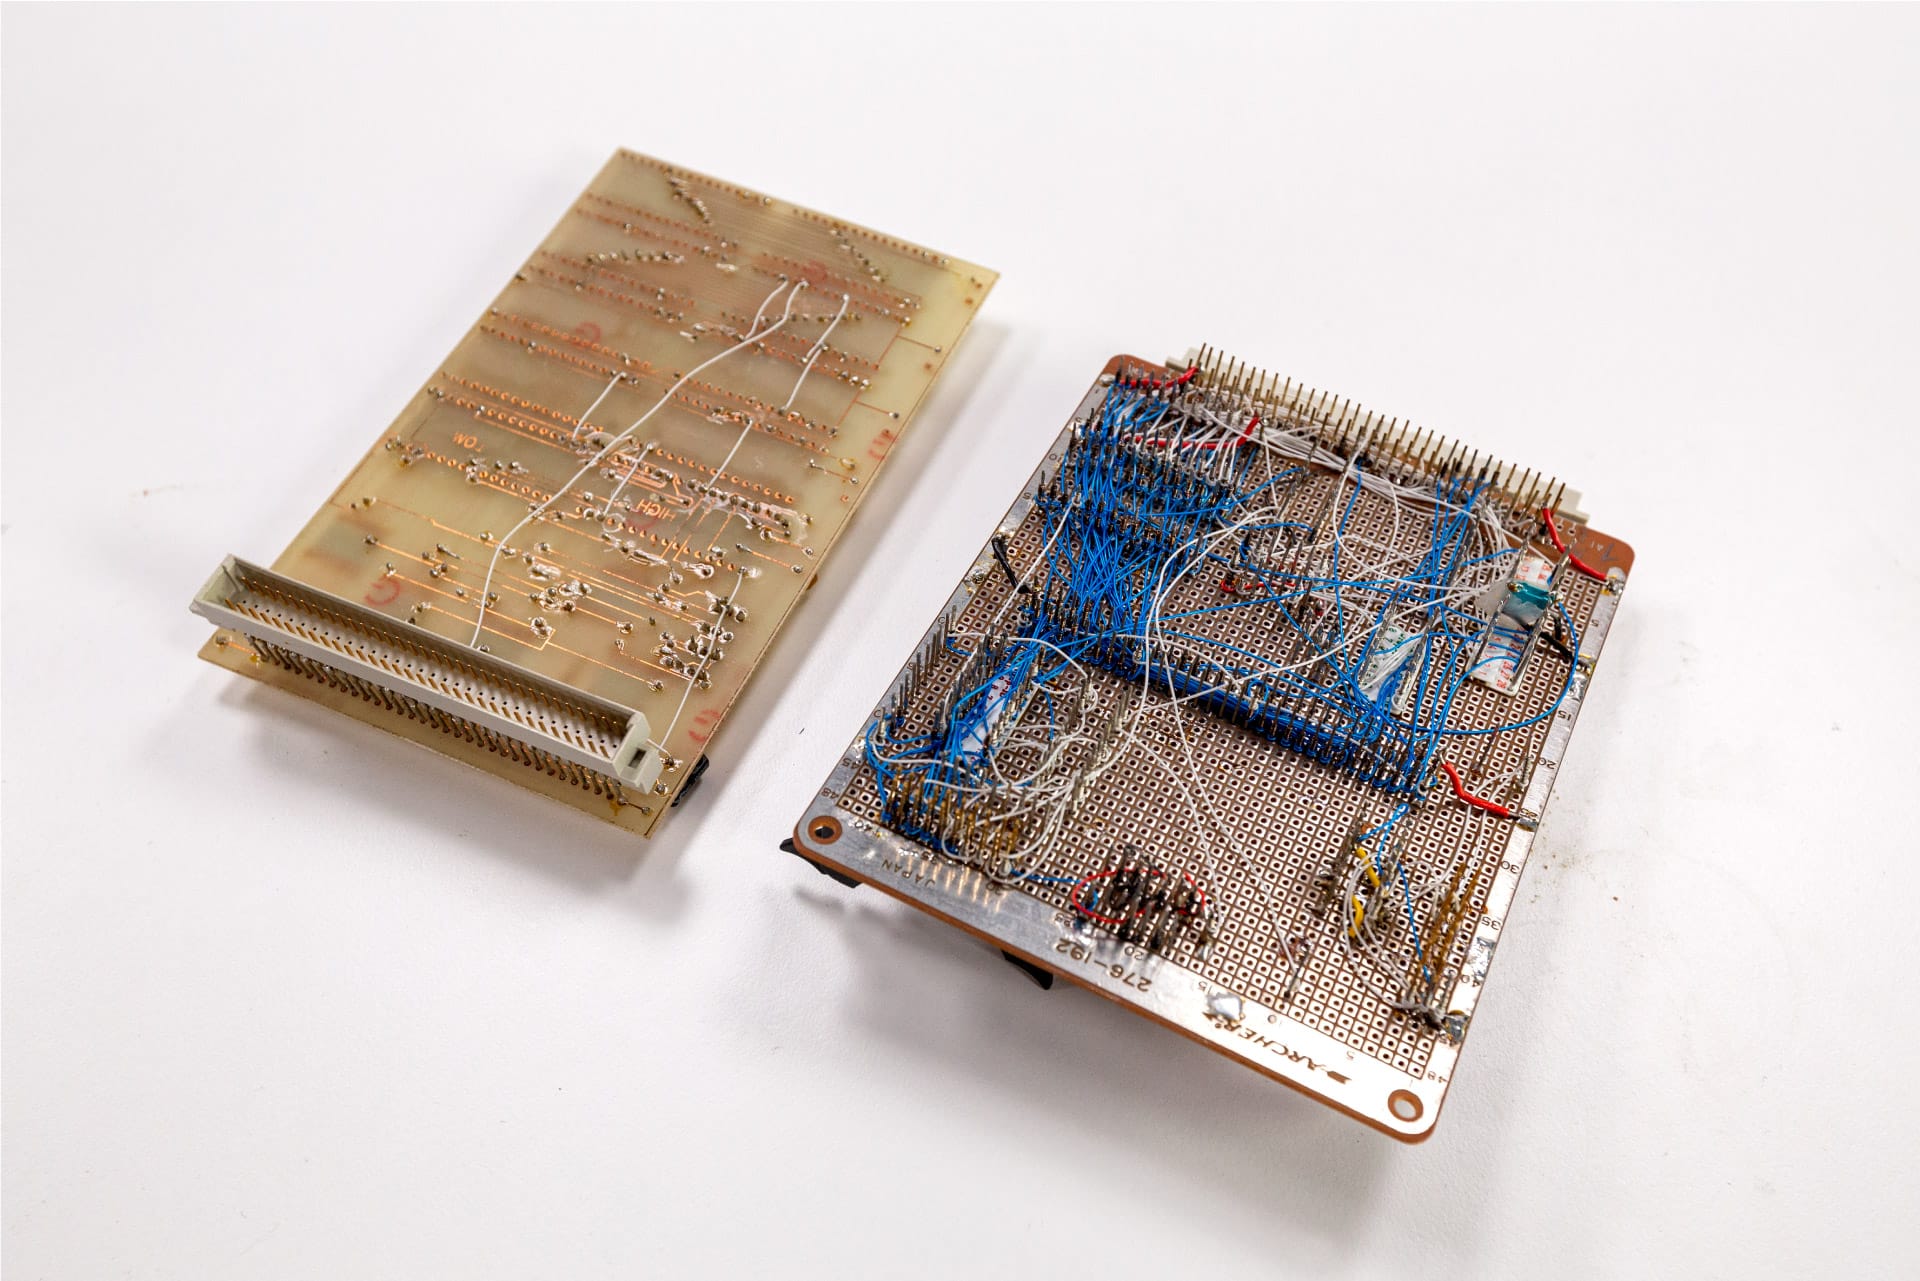
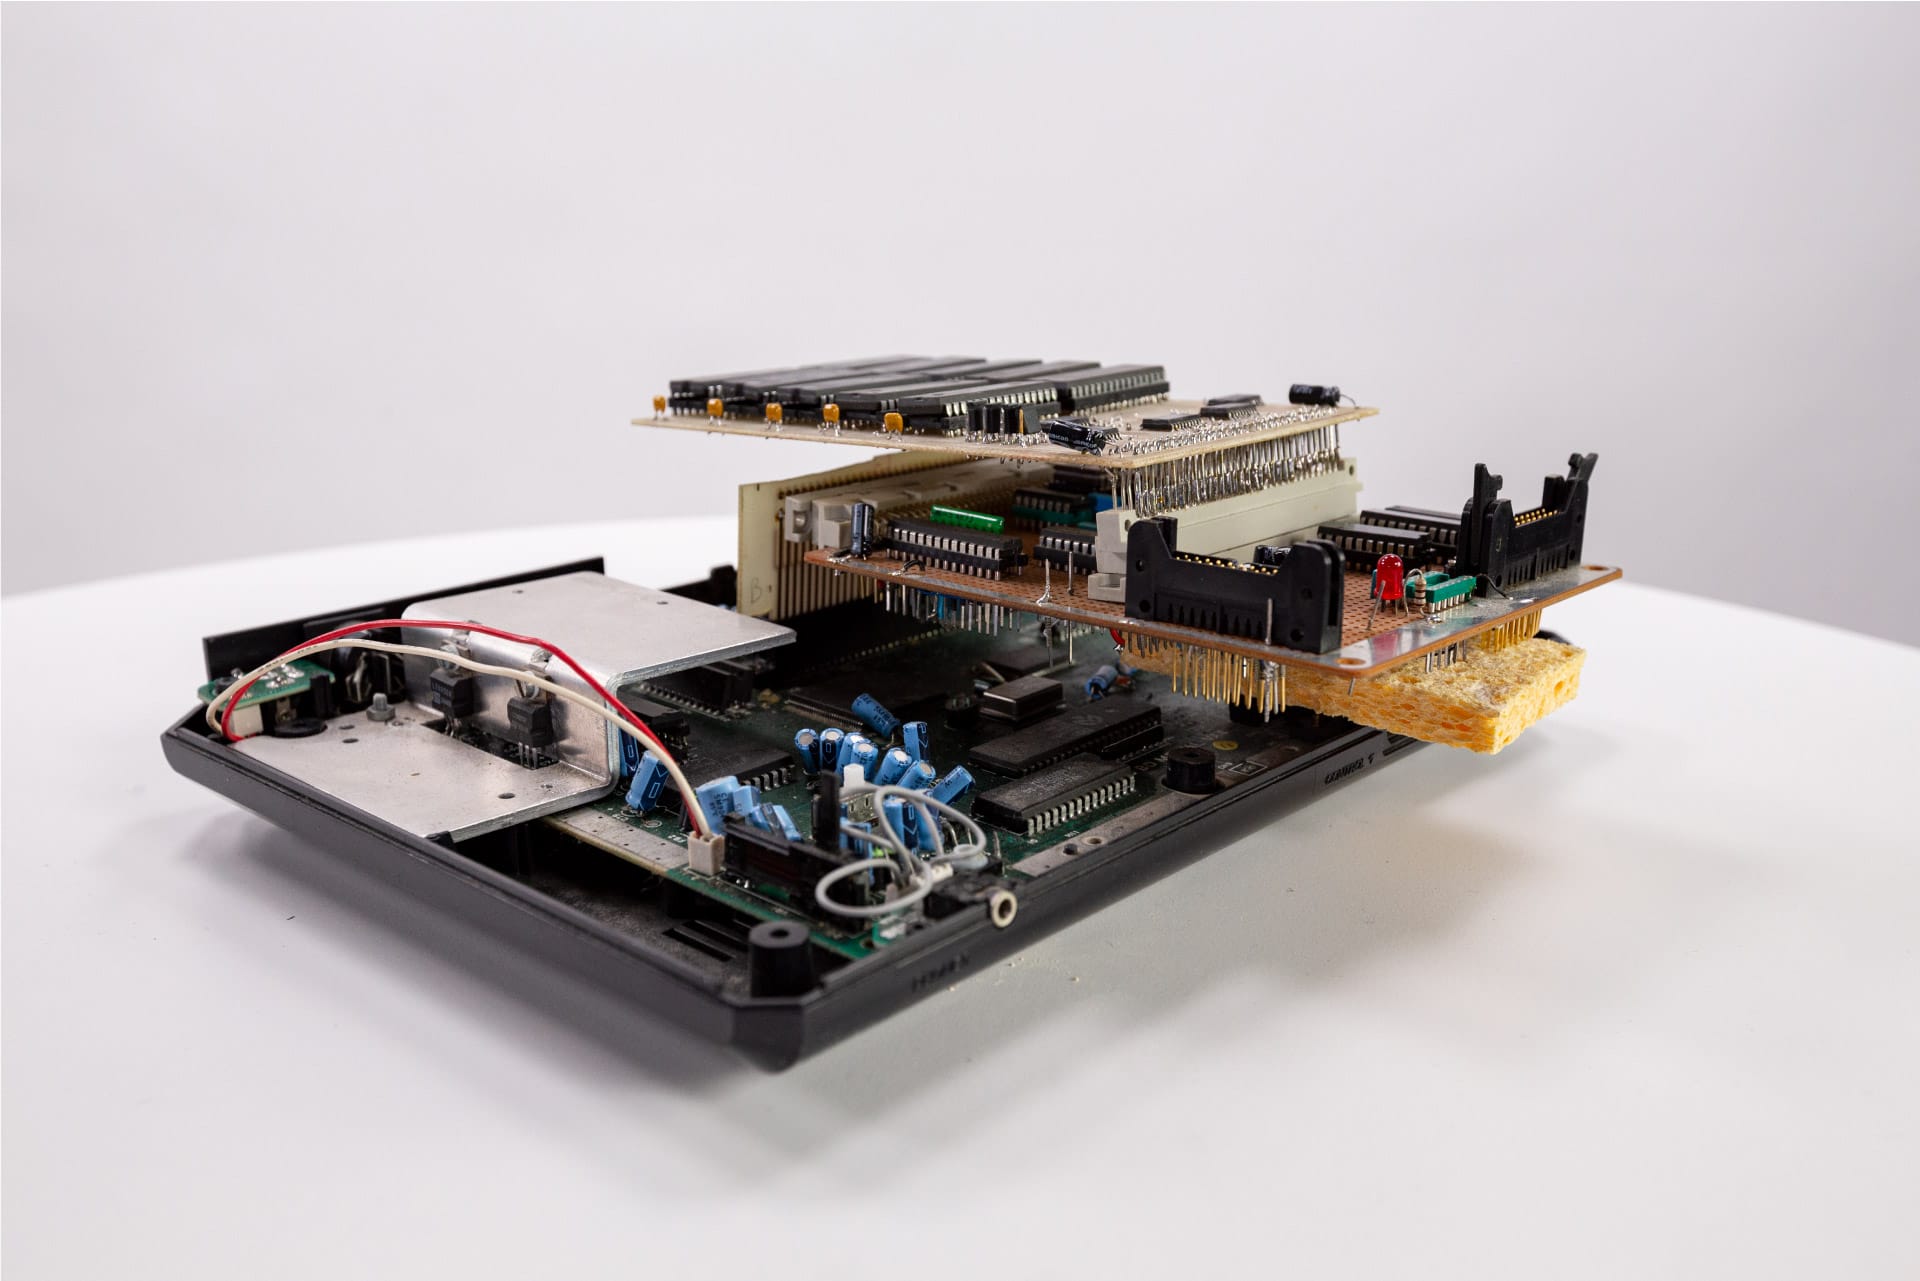
The development kit memory board
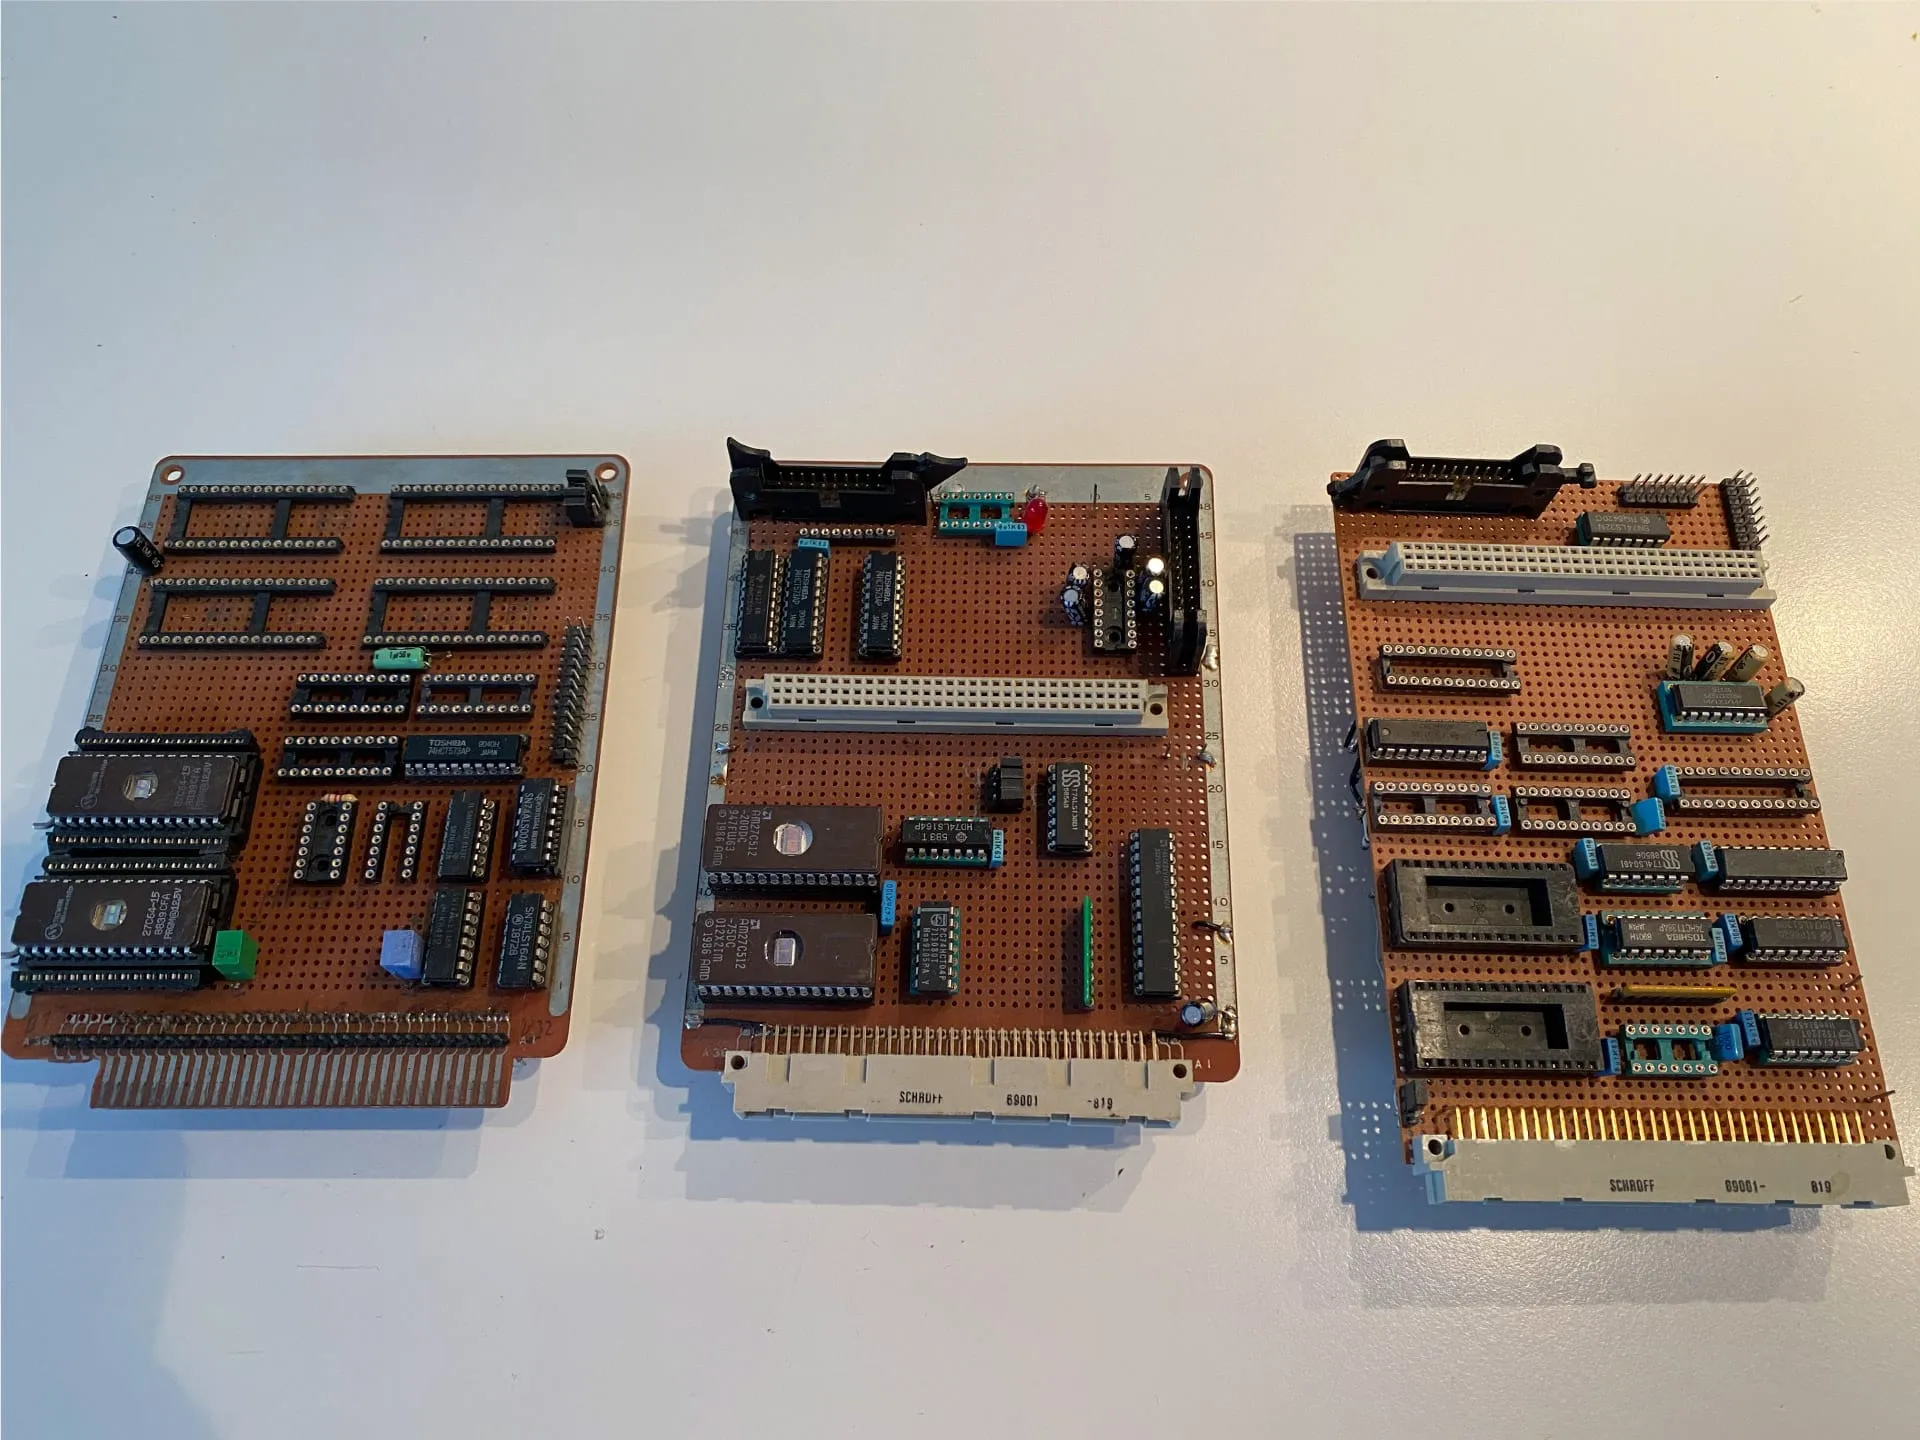
My design consisted of two circuit boards, one memory board that just held the static ram memory and one logic board for all the rest.
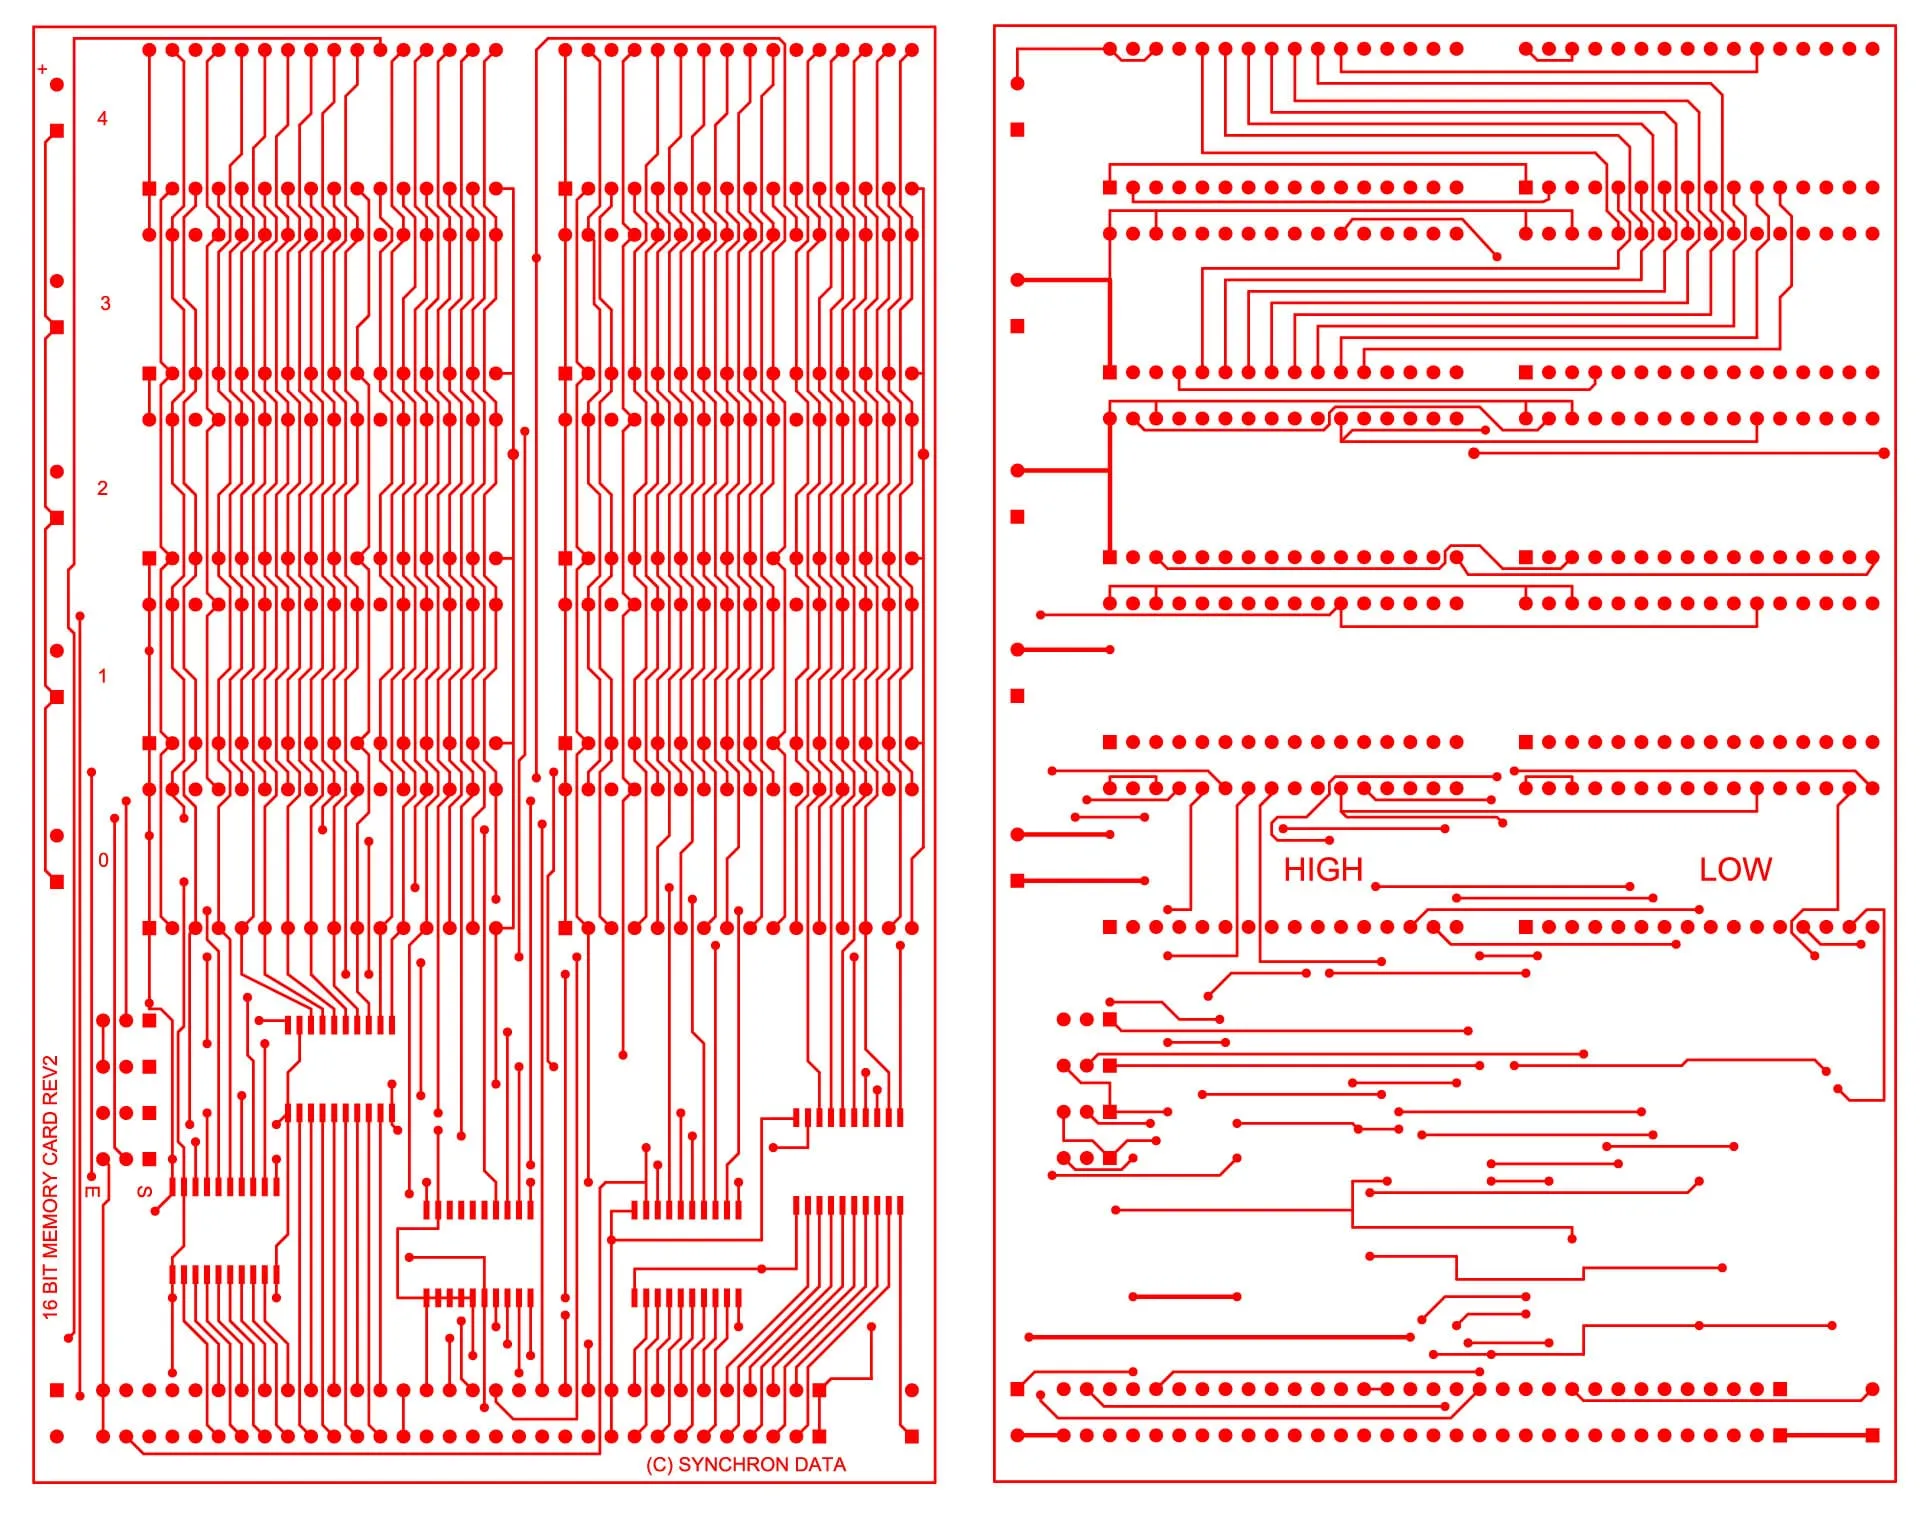
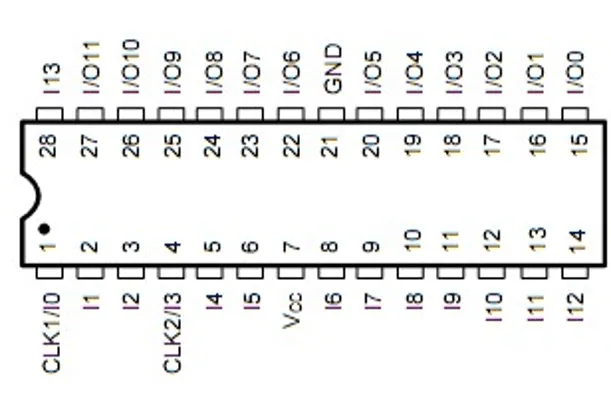
To store the game I created a memory board that consisted of ten 128 KB static ram memory chips (KM681000LP-8) with a total capacity of 1280 KB. At that time most games on the Mega Drive required 256–512 KB of storage while some needed more.
Besides the memory chips, I added the following buffers to the memory board, just to be sure that I would not overload the system bus on the Mega Drive:
- Two 74HC245 – 8-bit bi-directional transceiver for the data bus
- Three HC541 – 8-bit driver for the address bus
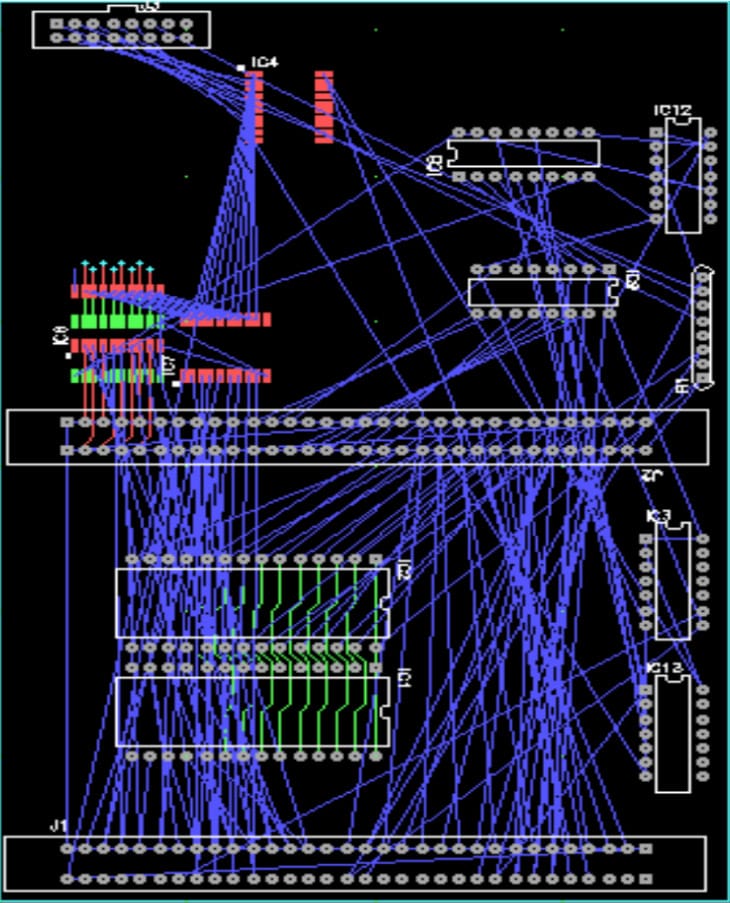
For the memory board, I eventually designed some proper circuit boards and also created a few different revisions of the board – here are a few of them:
I was able to extract the PCB layout files from the old DOS-based circuit board designer software that I used, using the DOSBox-X DOS emulator, and here is the result:
The development kit logic board
The second circuit board that this kit consisted of contained the following parts:
- Two EPROM chips that held the startup firmware
- Glue logic
- Connector to the memory board
- Connector to the host computer
The board went through several iterations, where the one in the middle is the latest and working prototype:
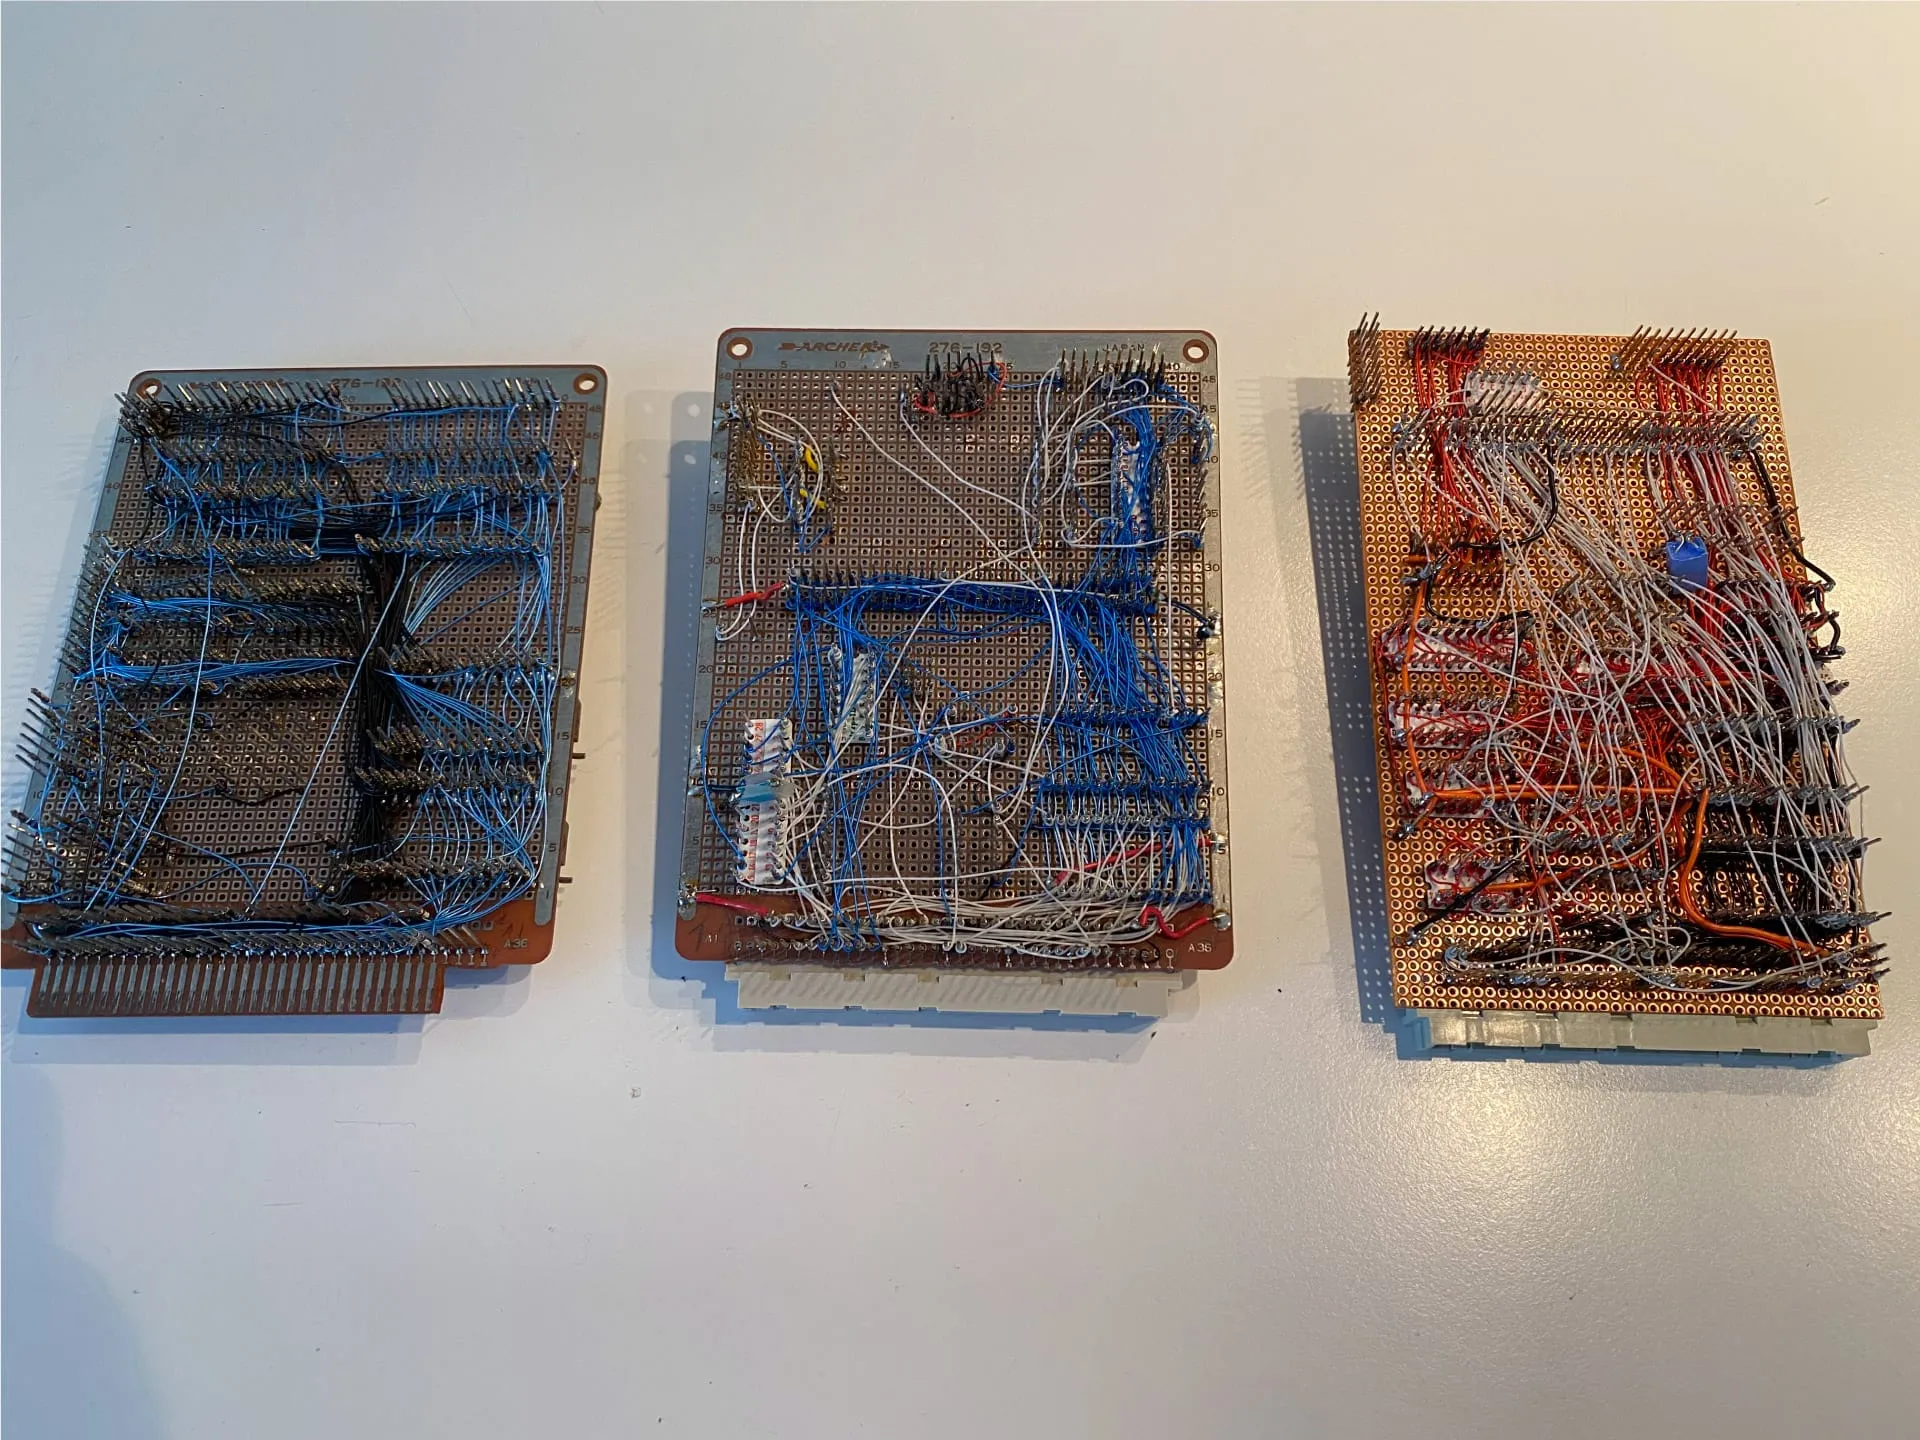
For rapid prototyping I wire-wrapped these boards as you can see below:
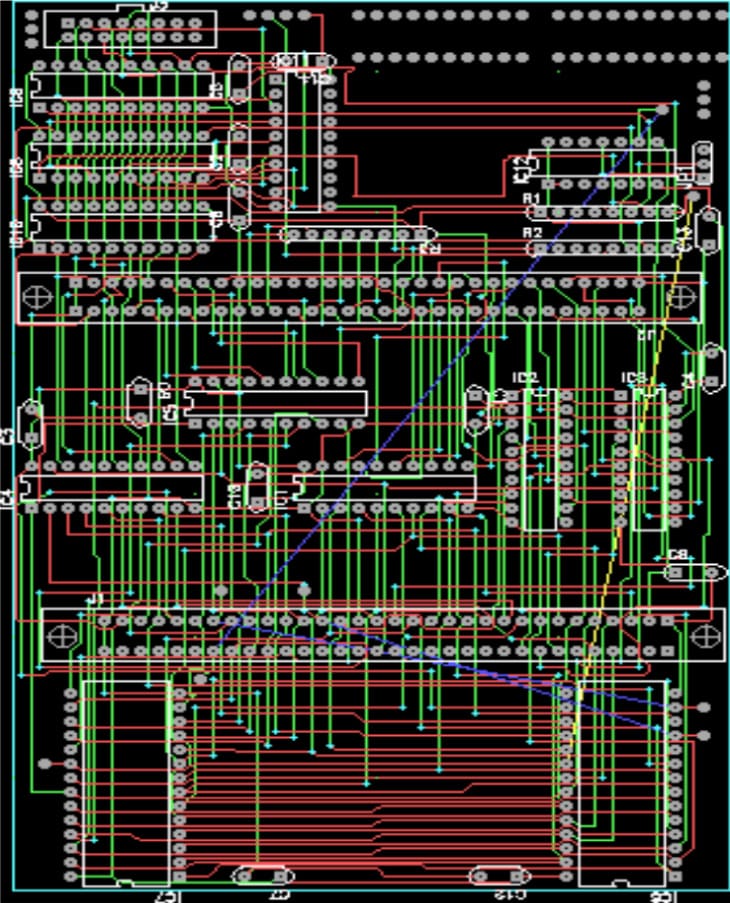
I started to design a real circuit board as you can see from the screenshots below, but unfortunately I never got around to actually building one using this board.
Glue logic
To tie up all the necessary logic, I added a small PAL (Programmable Array Logic) chip that contained some of the glue logic needed to tie it all up.
I managed to dig up some source code for this chip and I posted it as a GIST here for you to explore.
Schematics
The schematics for the setup can be found here. However, as version control was not a thing back then, I am not sure if this is the final schematics or not.
Did it work?
Yes, eventually I got it all to work and I was, for example, able to write simple applications and download them directly to the Mega Drive and run it. Eventually I got hold of enough detailed information to be able to control some sprites on the screen and control it using the joystick.
To do the actual programming on my Atari ST, I used a tool called Turbo Assembler. Turbo Assembler was a very unique assembly language IDE as it would pre-generate the binary data as you typed. The second advantage with Turbo Assembler was that it allowed me to develop my own custom drivers/targets. This allowed me to send the final assembly directly down to my hardware kit! Awesome!
Did I write any games? Unfortunately no. As I started my university studies, I didn’t have the time to pursue my game career any further. But it sure was a very fun project and I learned a lot on the way.
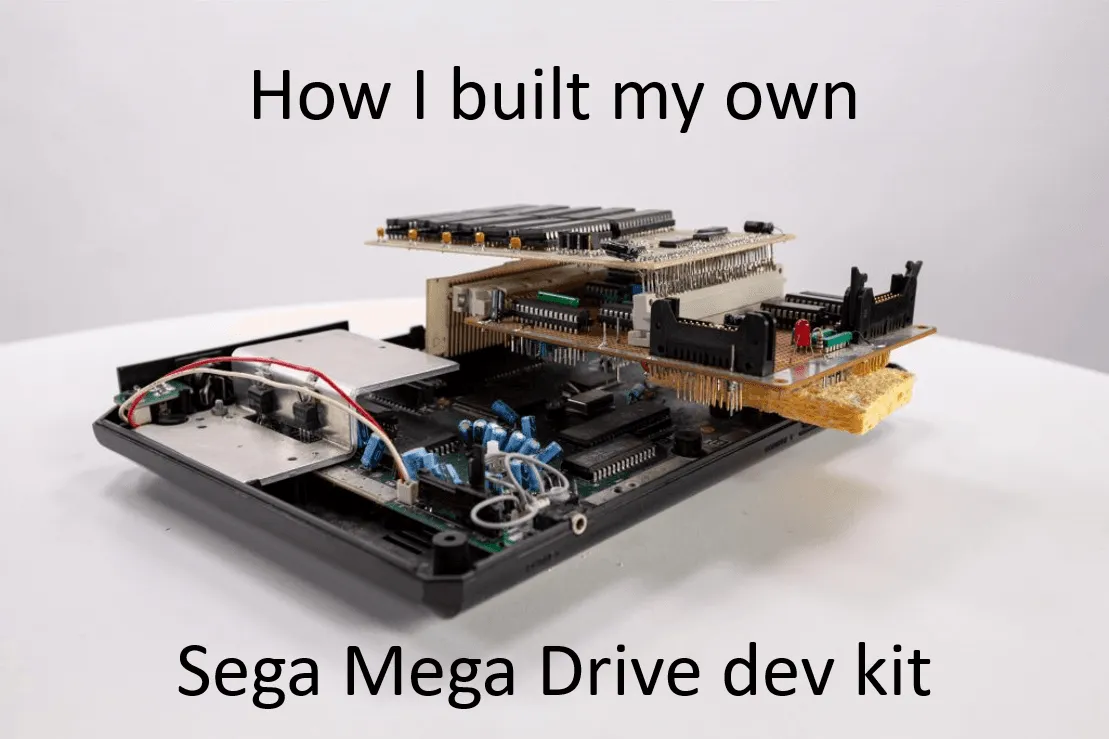
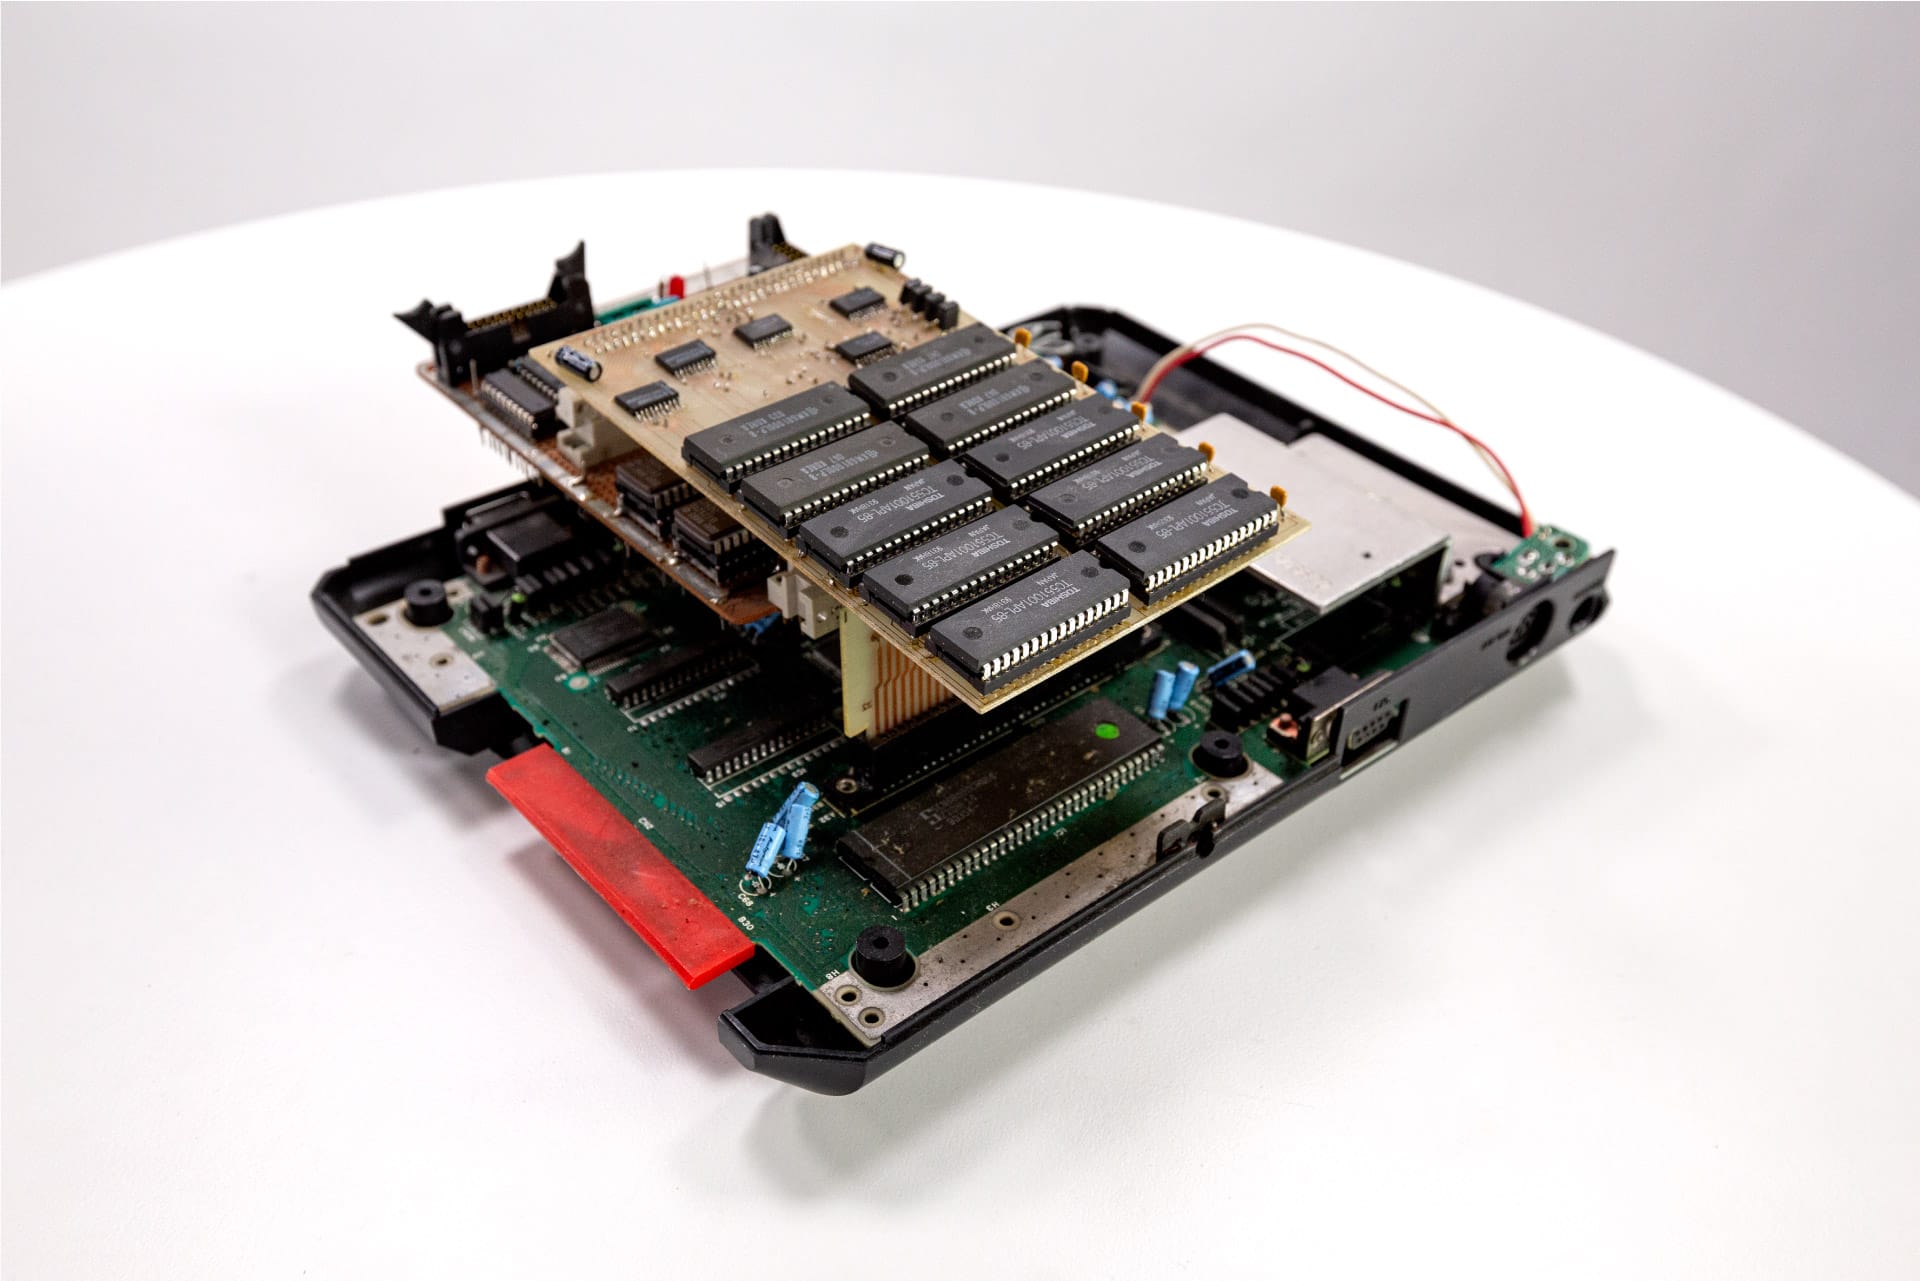
The final thing
So, what did the final project look like? Here are some photos:


Advanced firmware
As a side project I started to write a bit more advanced firmware with some more advanced debugging features and I’ve posted a copy of the source code here for you to explore.
It included features like debugging, setting breakpoints, downloading binary data, and other handy tools. I have no idea if it works or not.